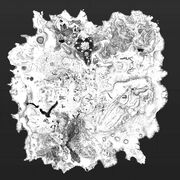
Hollow Knight immerses you in a dark yet occasionally stunning realm, where you begin your journey equipped solely with a nail and a spirit of exploration. As you venture further into a vast and treacherous landscape, you’ll discover that these tools are just sufficient for your survival. Expect to face harsh lessons, often resulting in untimely demises at the hands of formidable foes and the environment. However, this guide is designed to assist you in navigating the basics during your first hours of gameplay.
Obtain a map and enhance it.
Contents
Hollow Knight presents a complex and intricate world filled with hidden corners and winding paths. Many regions are expansive, with several corridors that may appear quite alike. As you delve deeper, you will start to recognize the most beneficial rooms for retracing your steps. To simplify your adventure, consider creating a map during your exploration.
While many games include an automatic mapping feature that activates as you explore, Hollow Knight requires players to buy the essential tools with the in-game currency known as geo. You can collect valuable geo shards by defeating foes, and they can also be discovered in groups scattered throughout the caves.
Team Cherry
At the beginning of your journey, you encounter a largely deserted cluster of buildings, referred to as the village of Dirtmouth. The primary highlight of this place is a well that you can descend into, marking the true beginning of your exploration in the Forgotten Crossroads region.
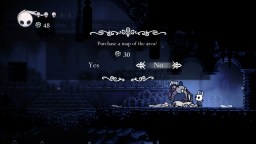
Upon reaching the base of the well, take a left and navigate down a steep vertical shaft filled with platforms and airborne foes. This area is an excellent spot for accumulating geo, as you can easily take down the numerous weak flying enemies. Eventually, you will arrive in a chamber scattered with bits of parchment. Inside, you will encounter a man named Cornifer, who specializes in map-making. He offers you a map of the Forgotten Crossroads for a modest fee of 30 geo.
Team Cherry
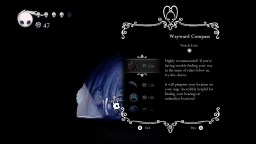
Upon acquiring the map, you may realize that you don’t have a compass. The Wayward Compass is available for purchase in the structure to the left of the well, located in Dirtmouth. You can buy the compass from a vendor named Iselda for 220 geo. Consider this your initial significant investment. If necessary, defeat weaker foes to gather enough geo to make the purchase.
When you’re in the vicinity, be sure to acquire the following items as well:
- Quill (120 geo): Enables you to enhance maps by marking regions that Cornifer has yet to explore.
- Bench Pin (100 geo): Instantly identifies and highlights the positions of benches on your map.
- Vendor Pin (100 geo): Marks your map with the positions of vendors you come across.
Iselda’s store offers additional items that you might want to acquire later to create more intricate maps. However, the compass and the enhancements mentioned earlier will significantly improve the ease of your travels.

Team Cherry
One last point regarding maps: When you venture into an unfamiliar region, you will need to navigate without a map initially. Your advancements will remain unrecorded, even if you possess the quill, until you acquire the map for that region from Cornifer.
Seek out pathways, seating areas, and merchants.
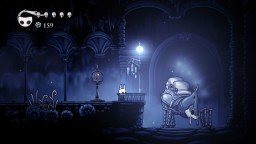
Upon entering a new location, your primary objective is to discover a bench. Once you find one, you can take a break and treat it as a checkpoint. Should you be defeated in combat, you will restart your journey from the bench where you last took a rest.
Resting on a bench provides the opportunity to equip any charms you’ve discovered or bought. These charms enable you to personalize your character. Additionally, if you possess the quill, taking a break at a bench will refresh your map, marking the locations you’ve explored that were previously uncharted.
Once you find a bench, you can keep exploring with confidence, knowing you won’t lose significant progress. Typically, areas are equipped with several benches, so it’s wise to expand your search from a specific bench until you discover another. After that, you can repeat this method, progressively delving further into the area.
While you venture through the area, keep an eye out for Cornifer, as he offers his newest map, which will help you track your journey more effectively. You’ll frequently catch the sound of his cheerful humming as you approach, and you’ll notice bits of parchment scattered along the hallways, guiding you along the correct path.
Team Cherry
Stations serve as key locations throughout the game, with one located in each significant region. Upon your initial arrival at a station, a fee is required to open the gate. Once the gate is unlocked, you can ring a bell to call forth a massive creature known as The Last Stag, who will transport you to any other accessible station. This mechanism acts as the fast travel system in Hollow Knight, greatly enhancing your efficiency in navigating the game.
Keep in mind that constantly using fast travel can cause you to overlook opportunities. Retracing your steps in areas where you’ve gained new abilities can reveal hidden rooms or shortcuts that you may have previously missed. These hidden spaces might hold charms or valuable treasures that are crucial for your journey.
Enhance your survival prospects with talismans.
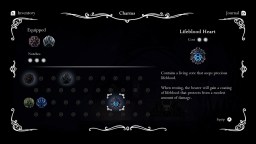
Charms play a crucial role in the universe of Hollow Knight, as they enhance your character’s abilities, actions, and movement. A prime example of a fundamental charm is the compass, which you can acquire from Iselda. Additionally, there are various other charms that enable you to dash more often, collect more souls from defeated enemies, and restore more health while resting at benches, among other benefits.
Team Cherry
You can equip only a limited number of charms simultaneously, regardless of how many you gather, and you can only assign them while seated on a bench. Each charm occupies one, two, or three slots, and the total number of slots you can use expands as you advance in the game. To enhance the maximum number of charms you can equip, you need to discover or buy charm notches.
You will discover numerous charms and several charm notches tucked away in remote areas. Accessing them often involves navigating through challenging foes or environmental dangers to arrive at a prominent dead-end room on the map. Additionally, a merchant named Salubra has collected a variety of charms and notches, which she offers for sale at her shop in the southeastern part of the Forgotten Crossroads. This shop is situated on a high ledge, so to get there, you must first obtain the Mothwing Cloak by defeating the Gruz Mother mini-boss, who is resting in a boss chamber located on the eastern side of the Forgotten Crossroads.
Unleash your imagination with your nails.
Using a straightforward forward slash with your trusty nail as a weapon is the most dependable way to take down numerous foes. However, as you advance, you’ll need to adopt different tactics. Certain enemies raise a shield to block a regular slash, but a swift jump followed by a slash can hit a vulnerable spot and achieve the desired effect.

Team Cherry
At times, exploration necessitates a downward push with your nail when landing from a jump. This method can help you bounce off certain spikes that would otherwise inflict damage. Additionally, you might encounter a broad expanse of water, with armored foes stationed above. By jumping off their backs, you can evade damage and prevent a plunge into deadly water. In other areas, hitting soft, rubbery berries from above can propel you upward, granting access to new heights as you navigate vertical passages.
You can direct your nail upwards by raising it while you attack. When you’re in a fixed position, this technique can be particularly useful for hitting foes that are coming down towards you, or for activating elevator switches later in the game. Placing a barrier between yourself and an enemy (or their projectiles) and allowing it to approach from above, then delivering an upward slash can be both rewarding and efficient.
When you hit foes with your nail, you usually get pushed back slightly due to the force of the strike. This recoil also impacts your adversaries. Take care to avoid being pushed off a ledge and into a void. Ensure you have enough space to maneuver and establish a steady rhythm. Certain enemies will roll towards you, retreat when hit, and quickly roll back your way. You’ll need to strike them two or three times to defeat them. As you progress, you can discover a charm that can remove the knock back effect.
Employ magic for both restoration and harm.
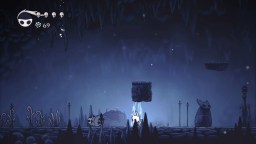
All magical spells draw from the same reservoir of soul energy. This implies that excessive healing can deplete your soul reserves, leaving you vulnerable when you need to execute a strong attack to fend off a fast and relentless enemy. Additionally, casting spells indiscriminately prevents you from healing until you inflict further damage with your weapon. Consequently, finding a proper equilibrium is essential.
Team Cherry
Overall, it’s advantageous to take out any opponents you face early in the game using only the nail. This approach preserves soul energy for healing. Enemies may land a few hits on you before you manage to defeat them, and bosses, in particular, can inflict significant damage quickly. By relying primarily on your nail to overcome most adversaries, you cultivate the skills needed to survive as the challenges in Hollow Knight’s journey become increasingly difficult.
Confront your inner shadow.
Should your struggle against foes and the forces of nature take a turn for the worse, you will deplete your final reserves of strength and fall to the ground. At that moment, your darkened essence — your shade — will rise from your lifeless body and linger ominously.

Team Cherry
Recall the spot where you met your demise and head back to that place. The spirit will be there, ready to confront you. Stay alert and don’t be surprised. Regardless of how far you fell in a specific passage, the vengeful spirit will be positioned near the entrance of that passage. Defeat it swiftly to avoid being defeated yourself.
Fortunately, your spirit isn’t particularly strong; rather, it tends to be more of an annoyance. It does accumulate magic alongside you, but typically, you can outpace it and land a blow before it even realizes you’re there. After that, you can quickly deliver another strike or two, and the fight concludes just like that. However, if you choose to be more careful, it may seize the opportunity to unleash magic against you. The key is to strike quickly and with determination.
If your spirit finds itself in a hard-to-reach area, a merchant in the central town can help bring it back for the cost of a spoiled egg, which is a scarce item in the game. This is a worthwhile option, especially if your spirit is carrying a significant amount of currency that you wish to protect.
- Guides
- Hollow Knight

