The Total War franchise can appear quite overwhelming for newcomers. With numerous intricate systems and a multitude of activities happening simultaneously, it can be a lot to take in. Total War: Warhammer III stands out as possibly the most intricate installment in the series. However, there’s no need to be concerned; this Total War: Warhammer 3 Beginner’s Guide will help you find your footing.
If you’re completely new to Total War or haven’t played in some time, it’s highly recommended to start with the prologue. It effectively introduces the various systems in the game and covers the fundamental mechanics of Total War, along with the additional complexities introduced by Warhammer. Therefore, if you’re looking to grasp the essential concepts, take the time to play the prologue first, and then come back here before launching your first campaign.
Combat Strategies for Total War: Warhammer 3
Contents
The combat system in Total War is undoubtedly the most intricate aspect of the game, yet it offers the greatest satisfaction. With an overwhelming variety of unit types available, it can seem intimidating. Fortunately, all units can be classified into several fundamental categories: Infantry (including swordsmen and spearmen), Ranged units, Cavalry, Large units, Flying units, Siege equipment, and Heroes/Lords. Each unit belongs to one of these categories, possessing distinct characteristics that set them apart.
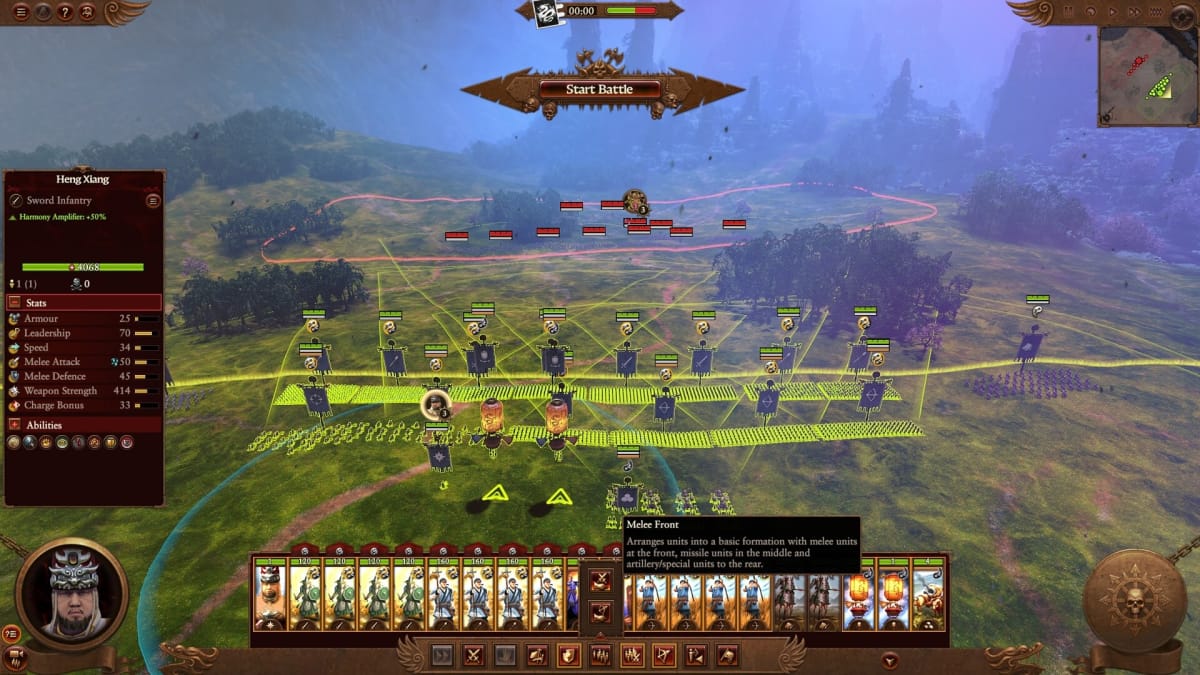
Begin with straightforward combat formations. The simplest approach is to position your infantry at the front, your archers behind, your siege units at the rear, and any additional units on the flanks. As a beginner, it’s best to keep things simple and gradually explore variations from this foundational setup. You can always replay the same battle, allowing you to test different formations within the same context.
The key point to keep in mind is to safeguard your flanks. Ensure that the enemy cannot easily maneuver to the sides of your forces, and shield your ranged units from being approached. If the enemy succeeds in reaching them, your ranged units will be occupied and unable to provide support.
Leverage the landscape to your benefit. Much of this is straightforward, such as the advantage of holding the high ground, where your opponents expend energy climbing while your ranged units have unobstructed shots. Additionally, identify choke points and areas of impassable terrain to focus the conflict. Regularly survey the map to identify the most advantageous positions.
Strategies for Utilizing Cavalry in Total War
Many units are straightforward in their usage, but cavalry often poses a challenge for newcomers. Cavalry units are designed for rapid strikes, moving swiftly across the battlefield. Their purpose is not to withstand damage or engage in extended battles, but rather to disrupt the enemy’s flanks and formations.
Leverage the rapid mobility of cavalry to maneuver around enemy forces, revealing their vulnerabilities. Launch your assault, then retreat to repeat the process. A swift strike against an inadequately protected side, or, even better, targeting their archers, can be crucial to achieving victory.
Be vigilant for any foes armed with spears, as they possess a significant advantage over cavalry and can inflict serious damage on your forces. Conversely, positioning spearmen at potential cavalry assault locations can effectively safeguard your units from cavalry attacks.
What types of units should I enlist?
It’s a complex inquiry that largely hinges on the specific army you choose. As you begin to familiarize yourself with the game, aim for a balanced approach. Trust your instincts, and remember that practical reasoning can take you a long way.
A simple yet effective army composition consists of infantry, preferably those equipped with shields, positioned at the front, supported by archers in the rear. Ensuring a sufficient number of infantry to provide protection is essential. To enhance your strategy, incorporate some cavalry, and then explore the distinctive units available to your faction. Understand their roles by reviewing their strengths and weaknesses, and use this information to develop a well-rounded army.
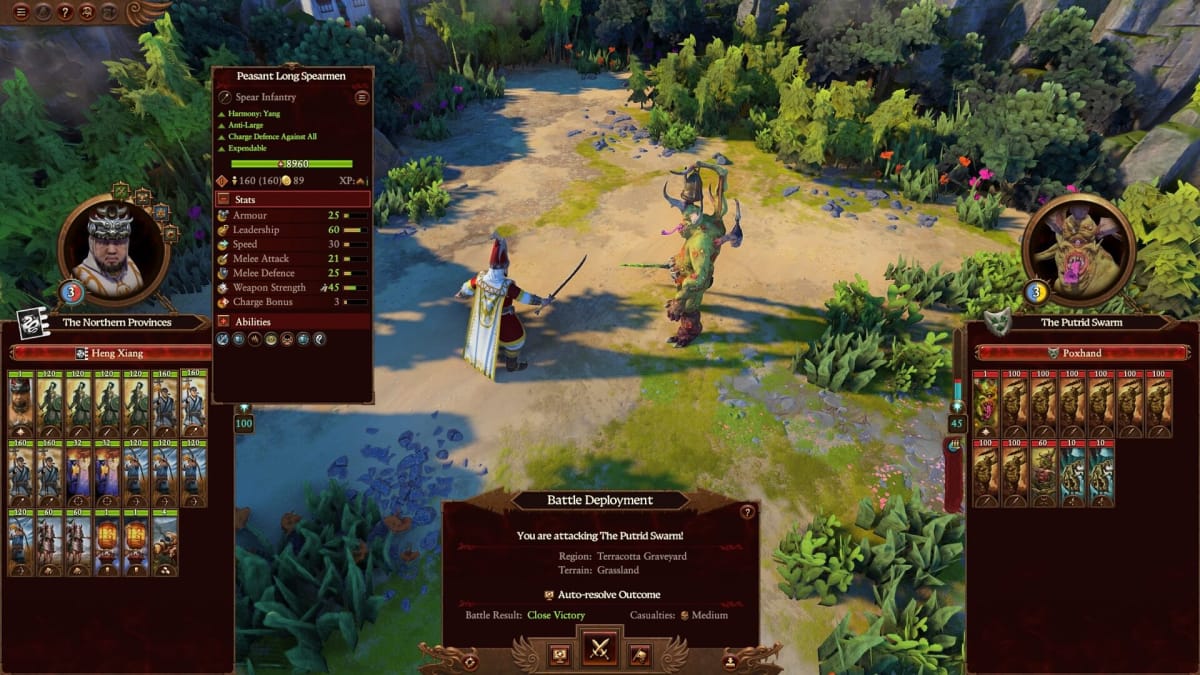
No matter what your army consists of, it’s crucial to occupy all 20 slots immediately. This strategy will significantly aid you in swiftly navigating initial battles as you secure your primary position in your current location. You have the ability to auto-resolve certain battles, which can save you a considerable amount of time, as the game evaluates the relative strengths of the two armies to determine the victor. Clearly, having a larger number of units is the simplest method to enhance your army’s power in the early stages.
Throughout your gameplay, you’ll encounter numerous chances to modify your selections or swap out anything you find unappealing, so there’s no need to stress about the abundance of options presented to you at the start.
In Total War: Warhammer 3, the Heroes and Lords can significantly alter the course of the game.
A wide variety of hero units exist, each featuring distinct mechanics. Some of these units serve as formidable powerhouses, capable of inflicting significant melee damage or absorbing substantial amounts of it. Their strategic applications are invaluable; for instance, you can deploy a tank to confront the enemy’s powerful lord or hero, absorbing damage on your behalf. Others can act as a one-man army, wreaking havoc on your forces.
Try out the resources available to you and familiarize yourself with the spells you possess. Area of Effect spells can significantly weaken opposing forces, but be cautious not to harm your own troops in the process.
Simply examine their capabilities, explore their skill trees, and the possibilities for those units will quickly become clear.
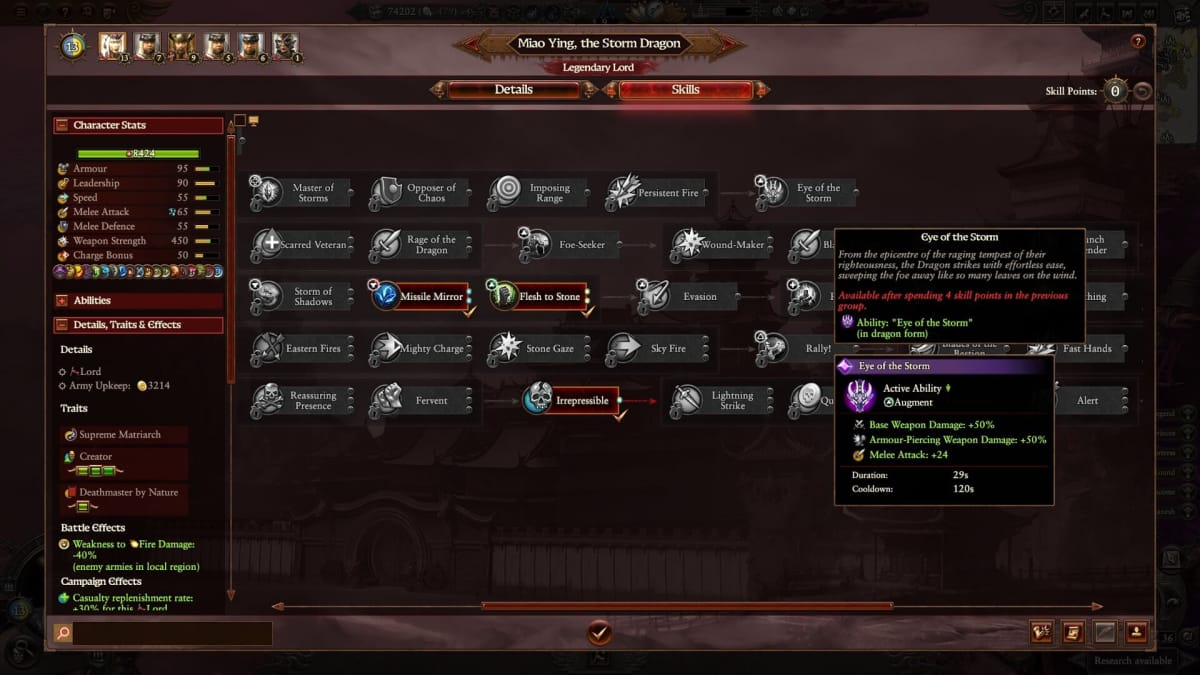
Be cautious when facing Legendary Lords, as they are essentially enhanced heroes equipped with extraordinary abilities and impressive statistics. These characters are distinguished by their unique models and play a significant role in the lore and narrative of Warhammer 3. The primary lord you begin with will also be a Legendary Lord, so be sure to thoroughly examine their skill tree to understand their capabilities. They probably possess unique traits that can significantly influence the outcome of battles.
Diplomatic Strategies for Total War: Warhammer 3
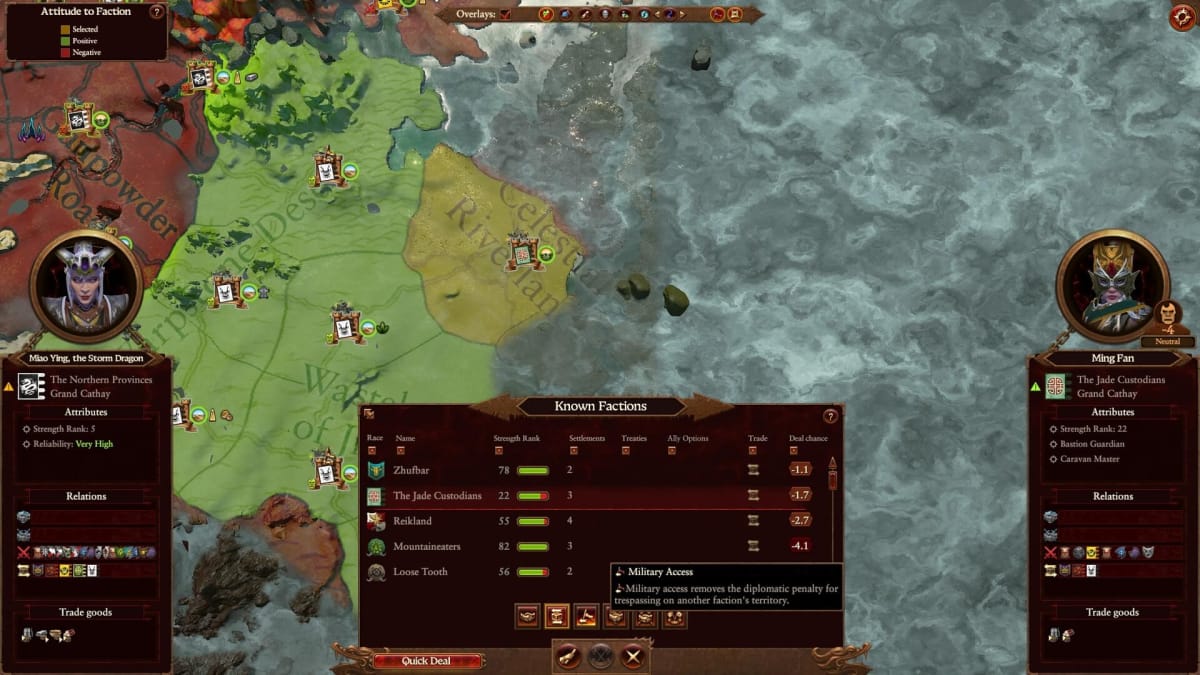
At the beginning, while familiarizing yourself with the campaign map, observe the various factions in your vicinity. Pay attention to which ones are allies and which ones might pose a threat, potentially leading to conflict down the line. Your neighboring factions can disrupt your strategies, so maintaining a degree of diplomatic relations is crucial.
When surrounded by numerous hostile factions, securing a swift ally for a defensive alliance can be extremely beneficial. If you come under attack, your ally is likely to come to your aid, providing crucial support. Additionally, having allies can serve as a deterrent to potential aggressors, so it’s wise to identify the most advantageous partners and establish agreements as soon as possible.
Commerce in Warhammer 3
Trading offers a fast method to increase your earnings in Warhammer 3. By utilizing the quick deal feature in the diplomacy menu, you can identify the factions available for immediate trade. Establish these deals, as they represent a source of income you wouldn’t want to overlook. Remember to regularly revisit the menu for new trading opportunities, as your options will expand as you explore the campaign map further.
Dependability Matters
Imagine you intend to engage in conflict with a particular faction that stands in your way or possesses territory you desire. What happens if that faction happens to be your ally with whom you have a formal alliance? You could choose to declare war on them and seize their assets if you wish. However, be aware that doing so will negatively impact your reputation for reliability.
If your trustworthiness is lacking, groups will be hesitant to engage with you, making negotiations significantly more challenging. Although your reputation can improve over time, provided you don’t betray anyone further, this process will require patience. It’s essential to consider your choices thoughtfully.
Tips for Constructing in Total War: Warhammer 3
Each faction possesses a distinct array of structures while employing identical mechanics to expand their empire. Warhammer 3 revolves around conflict, doesn’t it? However, sustaining your armies requires a significant financial investment, making it crucial to establish a strong economy.
Tips for Maximizing Income in Warhammer 3
As previously mentioned, trading plays a crucial role, and the worth of your transactions is influenced by the goods you have available. Certain settlements will provide distinct resources, such as timber, furs, and gold, so it’s essential to build the facilities that generate these resources. The greater the variety of unique resources you possess for trading, the higher your potential earnings from trade agreements.
Certain structures will inherently produce income, but it’s important to focus on those that indicate an increase in income by a specific percentage related to a particular building, resource, or similar factor. As you expand your settlements during the game, the value of these structures will increase, especially since you will likely have multiple similar buildings across your empire. Therefore, any factor that contributes to a percentage increase will have a compounding effect as your empire grows.
An effective method to earn gold early in the game is to engage in battles against enemy forces. You’ll often find adversaries nearby, and winning these encounters grants you gold. Additionally, you have the option to increase your rewards if you desire. This approach provides a swift boost in funds, which can be useful for your next building upgrade or other necessities.
Warhammer 3 Expansion
Expansion plays a crucial role in establishing your empire. Numerous structures influence your growth, and setting them up promptly will enable you to construct additional facilities in the future. Increased growth results in a larger population, and enhancing the primary building in a settlement necessitates reaching a specific population threshold. The number of building slots available and the upgrade levels for your existing structures are directly linked to the level of that primary building, making its upgrade essential.
As your growth expands, your population will increase, enabling you to boost your income, access stronger units, and much more. Growth plays a crucial role in your advancement. Enhanced units are restricted to upgraded structures or can only be constructed at specific settlement tiers, and the only way to obtain these structures is by advancing a settlement through population growth.
Objectives for the Warhammer 3 Campaign
The campaign map in Warhammer 3 is filled with chaos, and there are aspects that might not be immediately obvious. Your goal is to collect the four souls from the realms of chaos, but there are a few important details to be aware of before diving in.
Initially, the primary lord you begin the game with is the only one capable of entering the rifts to access the realms of chaos. Ensure that this lord is equipped with your strongest units, forming a complete stack of 20, prior to your entry.
The rifts remain accessible for a short duration, so it’s crucial to enter one without delay. Additionally, it’s a competition for souls, as only a single soul from each realm is up for grabs each time a rift is active. Therefore, if you find yourself navigating the realm of Slaanesh and someone else secures the soul before you, you will be expelled and will need to wait for the rifts to reopen to try again.
Entering rifts or the portals located within them will consume all of your lord’s movement for that turn. Therefore, be sure to position them as you desire beforehand.
Realm of the Plague Master (Nurgle)
The loss of your troops is a serious matter, so avoid moving without adopting the encampment stance. While this may slow your progress through the realm significantly, it’s the only strategy that will ensure your army’s survival in the long run.
Domain of the Enchanter (Tzeentch)
Upon conquering an army in this location, you have the opportunity to unlock a sigil as a bonus for your victory, alongside the other rewards. It’s highly advisable to select this option, as understanding the destinations of the teleporters is extremely beneficial. Additionally, every region in the realm features a location where you can fully restore your army or uncover additional sigils, so be sure to take advantage of that as well.
Domain of the Dark Prince (Slaanesh)
It’s primarily a simple task: navigate through the concentric circles until you reach the center. Keep in mind that entering a portal will halt your movement for that turn.
Whenever you descend into a circle, Slaanesh will present you with a proposition. You have the option to accept it and exit the realm, but be aware that it comes with a cost. You will face certain drawbacks, such as a lasting rise in Slaanesh corruption or similar effects. Keep in mind that there could be unexpected repercussions that the offer does not disclose.
Realm of the Blood God (Khorne)
If you’ve come across the phrase “blood for the blood god!” then you know it refers to Khorne. To earn the favor of Khorne, you must eliminate as many foes as you can in a short amount of time to be considered worthy of claiming a soul. There are certain locations on the map where you can find powerful weapons to equip to a hero or lord, so it might be beneficial to explore those areas. Keep in mind, however, that you will lose those weapons once you exit that realm.
I trust you found this information useful, and best of luck on your journey!


