When you first dive into the game and Professor Willow tosses you into the world, you find yourself completely lost, with no clue about the meaning of the various icons and terms. Meanwhile, everyone around you is buzzing with excitement, asking, “Which team are you on? There’s a lure at that Pokestop, and I just caught a Snorlax with a 1k CP!” and you’re left thinking, “What is happening? I need help!”
Aside from the Pokemon GO subreddit, the guides I’ve found through Google are either outdated or provide only snippets of information, making it incredibly frustrating to learn how to play the game effectively. This guide is designed for complete beginners, so let’s dive in!
Edit: Oh my goodness, Niantic keeps making changes, which means my guide is constantly becoming outdated. I’m going to go ahead and publish this for newcomers to get a general understanding of the situation, and I’ll make updates to reflect the changes whenever possible. I had just refined the tracking system before it was removed, and now I also need to update the battery saver screenshot! T__T
Menu – Click here to jump to the appropriate section.
Beginning Your Journey
Contents
Step 1 – Acquire the game
I won’t share any tips on unofficial methods since I don’t want to risk causing server issues while I’m catching my Pokémon. For those on iOS and Android, you can find the game in your app stores if it has been officially launched in your area. If you’re looking for hacks, I suggest looking for guides elsewhere.
Please be aware that the following guidelines are specifically for iOS users. However, those using Android should be able to locate the corresponding steps for their devices. Additionally, a quick search on Google can provide assistance if you encounter any difficulties.
Step 2 – Choose an initial Pokemon.
For those unfortunate individuals residing in remote areas, your radar might only show a few, perhaps just one, or even none at all. This is your reassuring Pokémon, reminding you that YES, they do exist, just perhaps not in your vicinity, unfortunately.
You have four options to choose from:
Charmander, Squirtle, Bulbasaur, and Pikachu.
The initial trio is straightforward; Willow will cause them to appear in your vicinity, allowing you to simply tap on them to start the catching process. However, catching Pikachu is a bit trickier. You must avoid attempting to catch the other three and continuously distance yourself from them, either on the map or in real life. Eventually, Pikachu will show up, making it possible for you to catch it. This has been verified by a level 3 friend who successfully obtained Pikachu as a starter by walking away from the other three, confirming that it is indeed possible.
Step 3 – Obtain the offline Google Map for the location or locations you plan to explore during your gameplay.
Please do this before you know actually going there cause the Google Maps app will require WiFi to download huge maps. To get into Offline Maps you need to open the Google Maps app, click the Menu icon (three lines by the search bar) –> Offline Areas –>Tap the plus sign located in the bottom right corner, then select Download.
This action will significantly reduce your mobile data consumption and speed up loading times for stops and other features. Since I began playing earlier this week, I’ve only consumed 110MB of data on my iPhone over the past five days. Avoid being the person lamenting in a week for exhausting 1GB of data simply because you neglected to download an offline map.
Step 4 – Activate Power Saving Mode (both on your device and within the game)
This game can significantly drain your battery. Luckily, you can activate Battery Saver mode to extend your playtime. Additionally, if you’re planning to play for extended periods, I suggest bringing a power bank, as you’ll likely find it essential for those longer sessions.
To accomplish this in the game, tap on the Pokeball, navigate to the Settings in the upper right corner, and select Battery Saver.
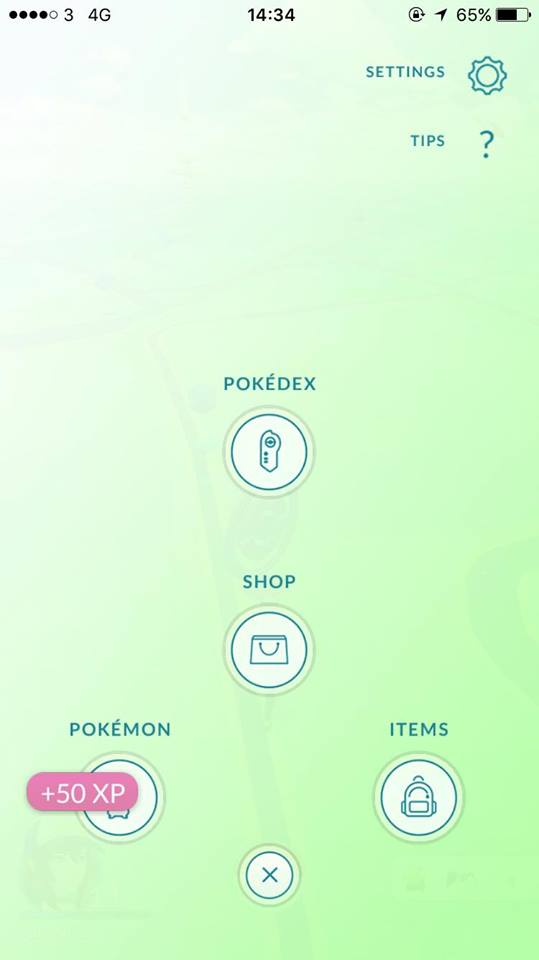
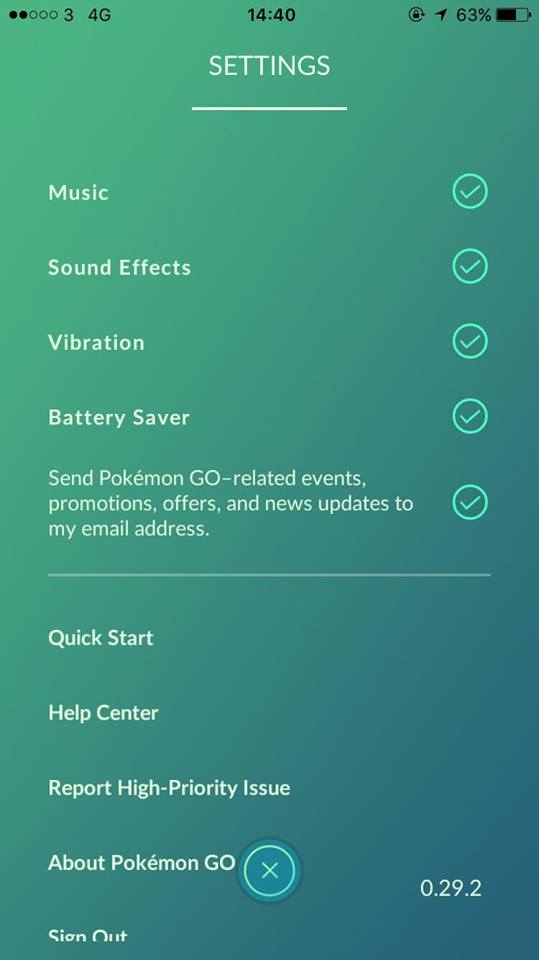
To enable this feature on your iPhone, navigate to Settings, select Battery, and activate Low Power Mode.
We are fully prepared and excited to start the game!
Grasping the game interface
Primary Display
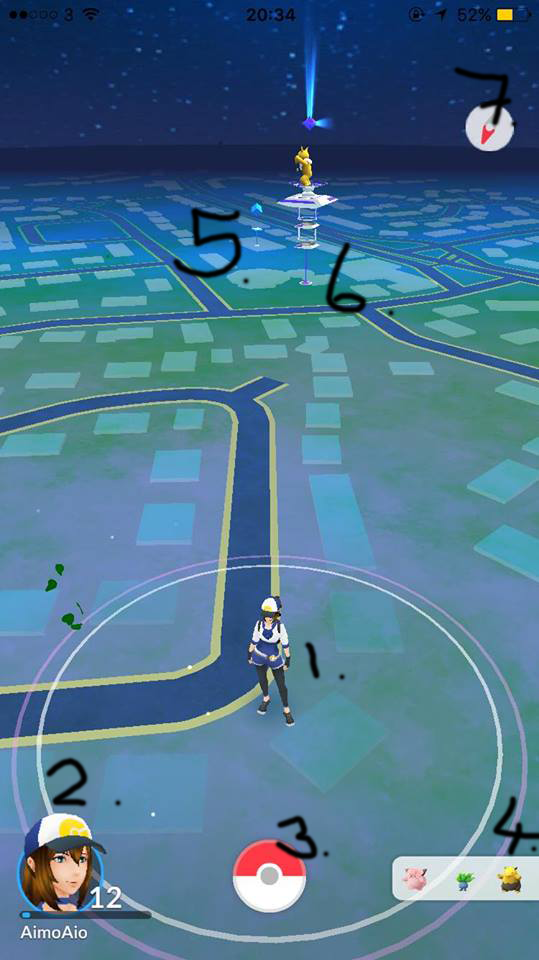
- Your in-game character represents your current position in the real world. The rings indicate the areas you can access from your present spot. Based on what I’ve gathered, zero paws signifies that you are in the white zone, while one paw indicates that you are on the edge of the purple zone. I’ve noticed that for Pokestops, you can often interact with them as long as you are within the purple ring, although this isn’t always the case. If you receive a message saying you are out of range, simply move closer.
- The player’s avatar, level, name, and experience bar are displayed. When you reach level 5 and join a faction, the color of your bar (and the surrounding circle) will change: red for Valor, yellow for Instinct, and blue for Mystic. This bar indicates your progress toward the next level. Additionally, clicking on it will open a different menu, which will be explained later.
- Primary Menu. The majority of your activities beyond capturing Pokemon will take place through this menu. It includes the Pokedex, the Store, your Pokemon collection, the Item Bag, and the settings. By selecting Tips, Willow will provide a very concise overview of gyms and related topics, but the information is quite superficial, as if detailed guidance is unnecessary.
- The Tracker is a tool that indicates the Pokémon that are in your vicinity. I will explain how to interpret the tracker in a later section of this guide, as it is crucial to grasp this concept in order to locate those rare Pokémon that are just a few steps away, especially when you have no clue which way to head.
- A location for collecting Pokéballs.
- A Pokémon Gym. The hue will change based on the team that is currently in control of it (in this particular instance, it is held by the Blue team).
Gamer Details

It’s quite straightforward; it displays your current level, the amount of experience points required to reach the next level, your journal, your PokeCoins, the date you began your journey, and your team.
You can indeed scroll down to view your medals; however, since they currently serve no purpose other than perhaps to show off, I won’t be discussing them at this time.
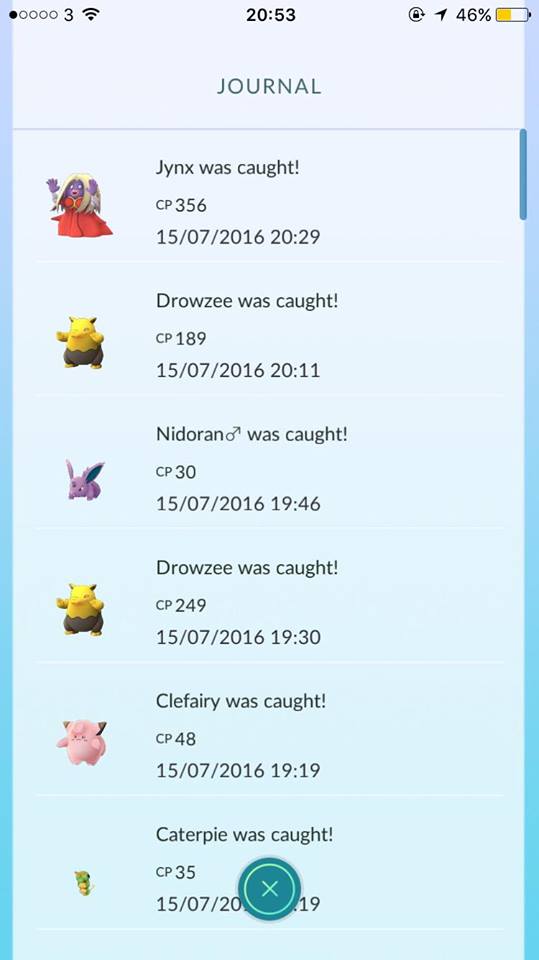
By selecting the Journal option, you can view timestamps and dates related to your recent activities in the game, including the Pokémon you captured or fled from, as well as the PokéStops you have visited.
Primary Menu
By selecting the Pokeball icon, you will access the primary menu, where several options will be available to you:
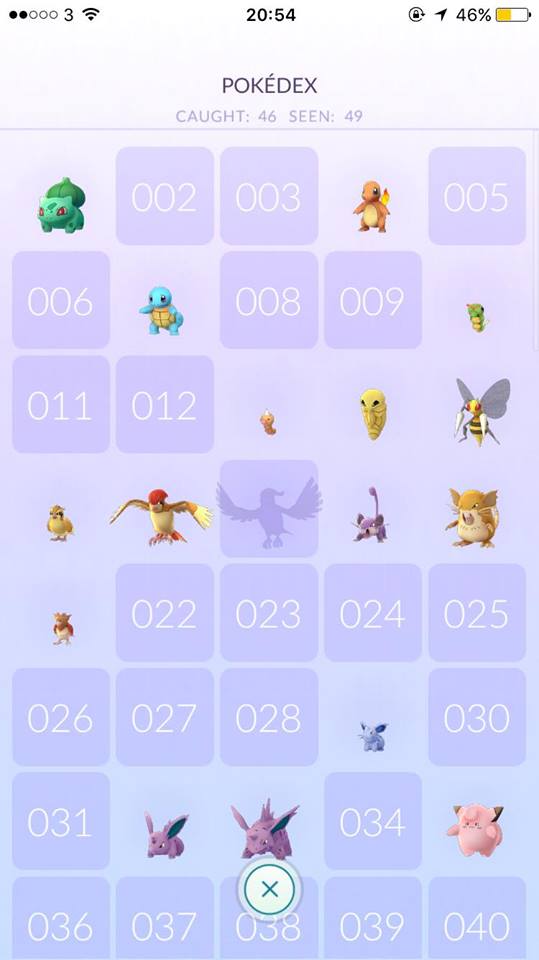
The title suggests that this is essentially a comprehensive guide that records the Pokémon you have encountered (specifically, those you have faced in a direct, one-on-one interaction) and the total number you have captured. By selecting a Pokémon’s entry in the Pokédex, you can access additional details about that Pokémon, including the number of individuals of that species you have caught.
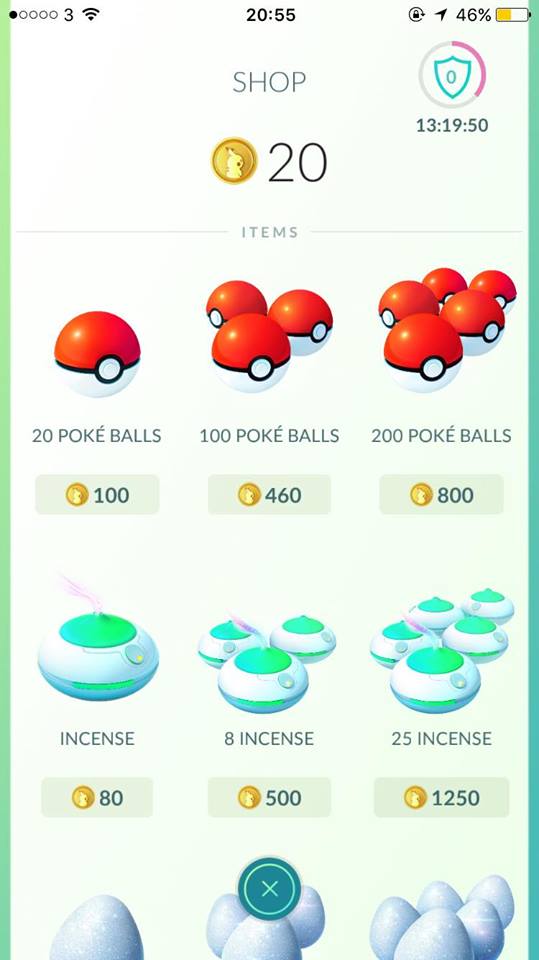
In this game, the currency is known as PokeCoins. Currently, there are two methods to acquire PokeCoins: by buying them with actual money or by receiving a Defender bonus every 21 hours in real time.
Prices may differ by region, but a common guideline is that the more coins you purchase, the greater the discount you receive. For instance, opting for the 550 coin pack provides an additional 45 coins compared to the 100 coin pack, which is a 5.5 times increase. The bonus continues to increase with larger purchases, so the 1.2k coin option will offer a more substantial bonus than the difference between the 550 and 100 coin packs, and this trend continues with larger quantities.
These coins can be utilized to buy various useful items within the game, including Pokeballs, Incense, Lucky Eggs, Lures, Incubators, and additional storage space for your items.
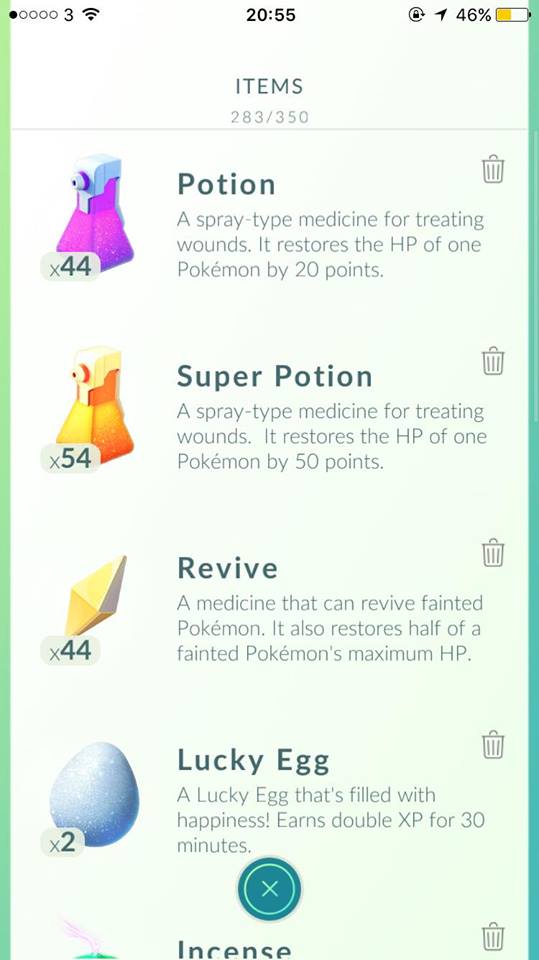
Here is a compilation of the possessions you have at the moment. Certain items are exclusively for use during encounters, like Razz Berries and Great Balls, while others, such as potions, revives, lucky eggs, and lures, are meant for use outside of encounters.
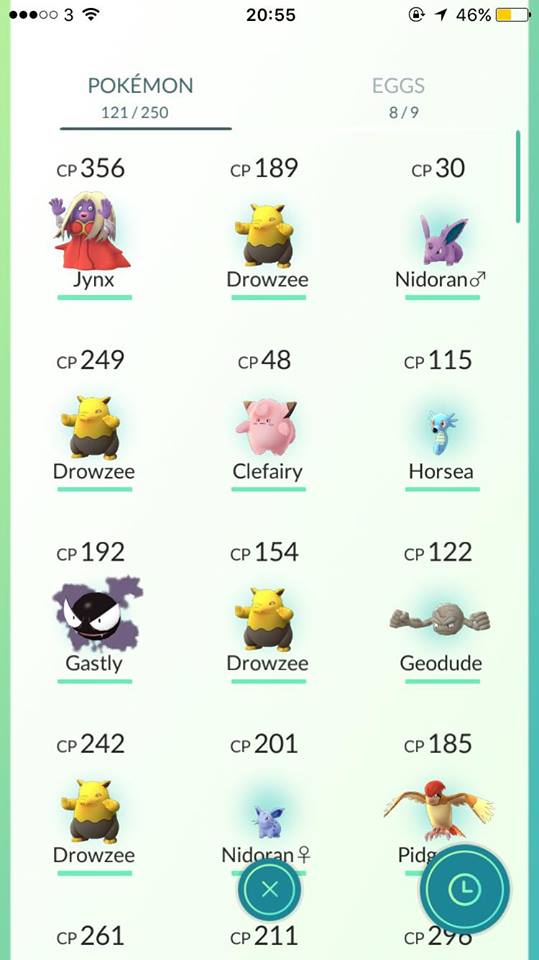
Here’s a compilation of all the Pokémon in your possession (consider it your inventory). By swiping left or tapping on the Eggs, you can view the eggs you have. You can also SORT the Pokémon list by clicking on the clock icon.
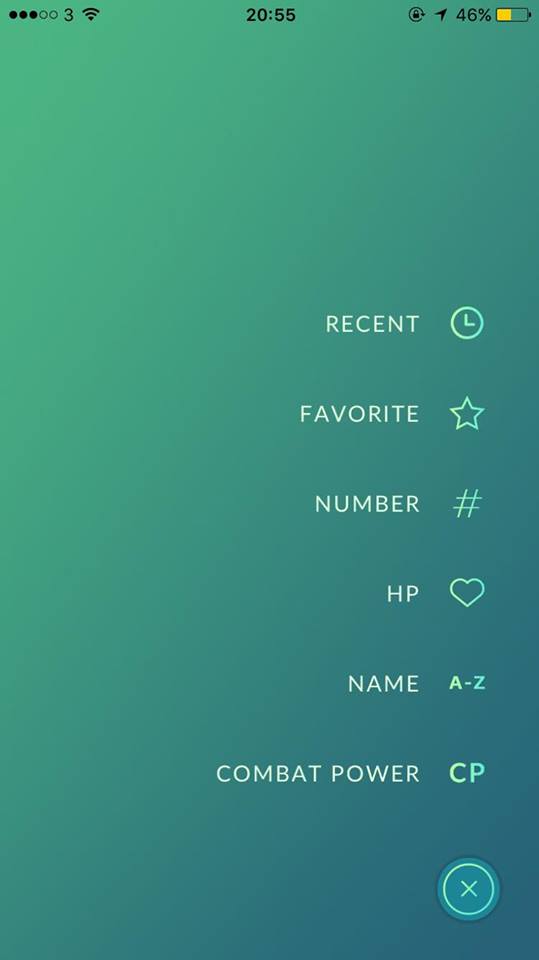
This feature proves to be extremely helpful when you accumulate a large number of Pokémon, making it challenging to navigate through the list.
Comprehending the tracking device
One of the most challenging tasks that you likely haven’t received guidance on!
By clicking on the Tracker, a menu will appear displaying the Pokémon that are currently in your vicinity.
![]()
The footprints can range from 3, 2, 1, to zero, with zero indicating that you are directly above the Pokémon. Here’s an informative image that illustrates how to locate Pokémon using these footprints.
![]()
This grid is perfect for transforming three prints into two, but how can you possibly find those three paws when there are around nine scattered across the map? That’s when the grid on the tracker comes into play to assist you.
The Framework of Grids
Paul Tassi conducted an investigation for Forbes to explore the role of the grid. Essentially, individuals positioned nearer to the top left of the grid represent those with whom you have the closest connections.
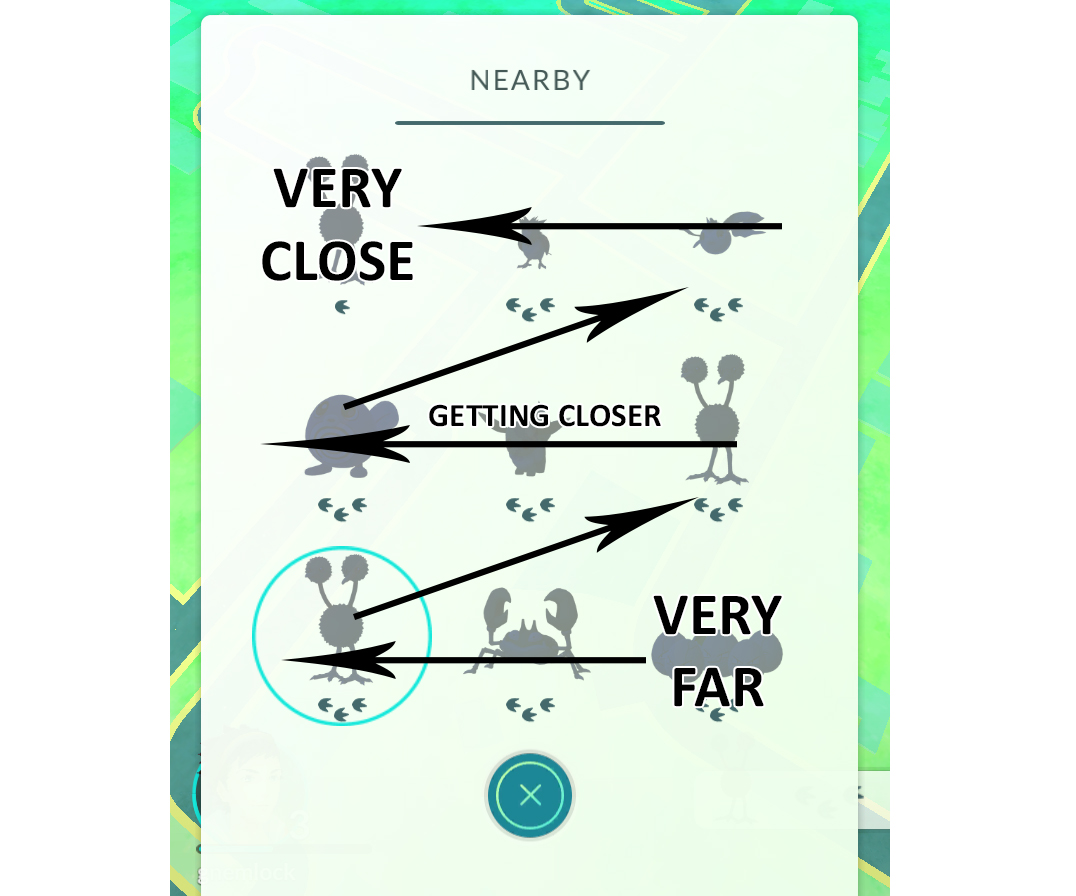
You can now start monitoring the Pokemon using the methods outlined earlier. If the Pokemon you’re after is positioned low on the three-paw print scale, your goal is to move it higher on the grid. To achieve this, walk in one direction as previously described and observe its location on the grid. If it begins to move upward, continue in that direction. If it doesn’t, turn around and retrace your steps to the point where it was nearest to the top left of the grid. Once you’re there, assess whether it is closer to the left or right, and repeat the process accordingly.
Comprehending CP and the process of leveling up Pokémon using Stardust and Candy.
CP, or Combat Points, indicates the strength of your Pokémon. The maximum CP is limited by your trainer level, meaning that lower-level trainers are more likely to encounter Pokémon with lower CP in the wild than their higher-level counterparts.
The CP of wild Pokémon you come across is always unpredictable. Even when you reach Level 20, you might still encounter a CP19 Wartortle. Think I’m joking?
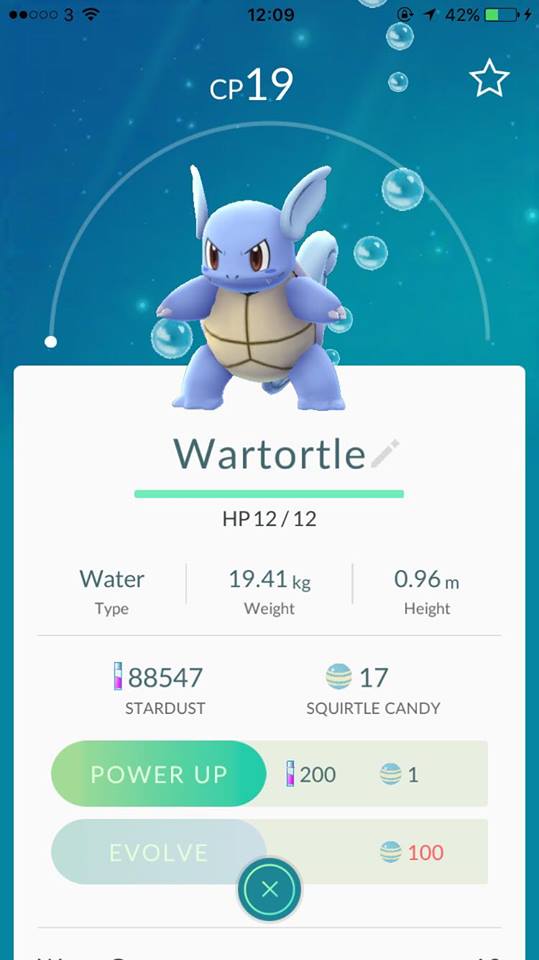
It’s truly disheartening to see that even my SQUIRTLE has a higher CP than this.
CP represents a combination of your Pokémon’s attack, defense, and hidden HP statistics. These values are derived from a set of metrics known as “IVs.” IVs are quite complex and are not essential for your current experience in Pokémon GO. Originating from the original console games, IVs essentially dictate which Pokémon, like your Squirtle versus your friend’s, is more powerful, even if they are at the same level. However, understanding IVs is not necessary for now, so let’s proceed.
To enhance your Pokemon’s capabilities and increase its CP, you must Power Up your Pokemon. This process involves using two forms of currency: Stardust and Candy. Stardust is earned each time you capture a Pokemon or hatch an egg, providing you with 100 Stardust per Pokemon, with egg rewards being randomized. Candy is collected by catching Pokemon of the same evolutionary line. For instance:


The progression of evolution in this case is Pidgey, Pidgeotto, and Pidgeot. To transform a Pidgey into a Pidgeotto, you require 12 Pidgey candies. To advance Pidgeotto into Pidgeot, you will need 50 Pidgey candies. It’s interesting to note that the second evolution stage also utilizes Pidgey candies.
What does this imply? It implies that capturing a Pidgey or a Pidgeotto does not impact your candy farming efforts, and in 90% of cases, Pidgey is simpler to catch than Pidgeotto. Therefore, unless your Pidgeotto has a low CP that makes it suitable for candy, it is not worth prioritizing over a Pidgey.
P.S. You can find all three in their natural habitats, so there’s no need to stress about having to obtain a Pidgeot to finish your Pokédex. If you haven’t managed to catch it after your first 100 “new” Pokémon, you might want to think about using 50 candies instead. In terms of experience, it’s simply not a good investment.
This implies that the lovely rare Omanyte you recently hatched won’t be evolving into Omastar anytime soon unless you manage to find another Omanyte in the wild or hatch a few more from eggs. On the bright side, you might feel fortunate, as I’ve only managed to get 2 Jynx, a Mr. Mime, and an Eevee from 10km eggs. /sobs
When is it advisable to utilize Stardust? The answer is NEVER, at least not until you reach level 20 or higher. You may wonder why. The reason is that acquiring Stardust becomes increasingly challenging as you level up, as it does not scale up significantly with your trainer level. For instance, that powerful Vaporeon you have will require 1,600 Stardust for each power-up, while your Pidgey only needs 100. However, you will only earn 100 Stardust for each Pokémon you catch, regardless of your trainer level. Therefore, a Jynx with 800 CP will not yield more Stardust than a Pidgey with 10 CP.
Let’s be honest, you won’t be winning any gyms with that 10CP Pidgey, even if you boost it to 200 CP ten times.
The main point is that, for the time being, you should refrain from using any Stardust. Concentrate instead on gaining experience points and leveling up, which leads us to…
Comprehending Trainer Rank and Experience Points
In summary, EXP stands for Experience Points. To advance your trainer’s level, you must accumulate EXP. There are various methods to earn EXP, with catching Pokémon being the most prevalent. However, the most effective strategy is to perform mass evolutions while using a lucky egg. To grasp this fully, we must first explore how the game awards EXP:
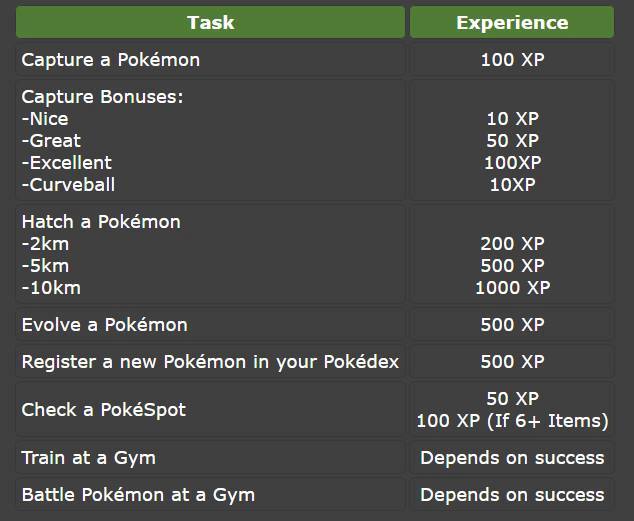
I will explore the various capture bonuses and the efficiency of hatching eggs in more detail later. For the moment, let’s concentrate on the fundamentals of capturing a Pokémon, registering a new Pokémon, utilizing PokéStops, and the experience gains from evolving.
Catch a Pokemon: 100 XP – As the description indicates, each successful capture will earn you 100 XP.
Visit a Pokestop: 50XP – The experience points you earn are largely influenced by the number of items you collect from a Pokestop. The number of items you receive can vary randomly, with possibilities of getting 3, 4, or even more. If you manage to collect 6 or more items, you receive a 50 XP bonus, totaling 100XP from that Pokestop.
Evolving a Pokémon grants you 500 XP. As mentioned previously, you will require candy for this process. Each evolution you complete will reward you with 500 XP.
Add a new Pokemon to your Pokedex: Earn 500 XP for each Pokemon that you haven’t registered yet in your Pokedex.
- In addition to the 100 XP earned for capturing it, you’ll receive a total of 600 XP for catching a new Pokémon.
- The same principle holds true for hatching eggs. If you hatch a 2km egg and the Pokémon you obtain is one you haven’t collected before, you will earn 200 XP for the hatch, along with an additional 500 XP bonus, resulting in a total of 700 XP.
- The same principle holds true for evolution; even if you haven’t encountered a Pidgeotto yet, you can still evolve a Pidgey into a Pidgeotto. This action grants you 500 XP for the evolution, along with an additional 500 XP for registering a new Pokémon in your Pokédex.
Why is it important to upgrade your trainer? What impact does it have? The impact is significant, to begin with:
- The CP cap limit of your Pokémon is influenced by the level of your trainer.
- The trainer’s level influences the percentage chance of encountering high CP Pokemon in the wild.
- The rank of your trainer determines the variety of items available to you at a Pokestop.
If your goal is to catch every Pokémon, it’s essential to level up to access improved Poké Balls for capturing the more elusive species. For instance, reaching level 12 grants you access to Great Balls, while level 20 unlocks Ultra Balls. These enhanced options provide a higher likelihood of successfully capturing Pokémon without them escaping.
Grasping the Concepts of Pokestops, Lures, and Items
One method to earn experience points (EXP) is by interacting with Pokestops. To do this, you need to visit the blue cube icons displayed on your map and “spin” them. This involves rotating the circle that appears on your screen. Doing so can yield between 3 to 8 items, which may include potions, Poké Balls, revives, Razz Berries, and eggs.
Unless you have a substantial amount of extra money to spend on Pokeballs (which become less effective at higher levels, especially for catching a rare 1000 CP Dragonite, for which you’ll prefer using ultra balls), you’ll want to make sure to spin every Pokestop you can access. And not just once—multiple times. Pokestops refresh every 5 minutes, so you can stay at the same location for 30 minutes and spin it up to 6 times. Pretty great, isn’t it?
However, simply remaining in one spot and repeatedly activating the same stop can become tedious, preventing you from exploring and capturing the Pokémon in your vicinity. This is where Lures come into play.
Lures are items that can be set up at Pokestops to draw in Pokemon. The Pokemon that appear at these lures are unique to that specific lure and are not listed in your nearby Pokemon list. This means that if a Dratini is attracted to your lure, only players in close proximity who can see the Pokemon in the lure area will be aware of its presence. Others will not be informed that a Dratini has appeared. The Pokemon that can be attracted by lures are random and can include any Pokemon, including fully evolved ones like Gengar.
Lures can be acquired as rewards for advancing your trainer’s level or purchased from the in-game shop for 100 Pokecoins each. Alternatively, you can buy 8 lures for 680 Pokecoins, which includes an extra 2 lures as a bonus.
To deploy a lure at a Pokestop, you must be within its range, meaning you need to be close enough to interact with it. However, you are not required to remain at the Pokestop for the lure’s entire duration. You can place a lure, stay for just a few minutes, and then leave, and it will continue to attract Pokémon for other trainers. All trainers nearby will be able to take advantage of the lure. You do not need to be able to spin the Pokestop to catch the Pokémon that spawn from the lure, as the area from which you can see Pokémon is larger than the Pokestop’s range. A lure will remain active for 30 minutes.
Comprehending Eggs and Incubation Devices
Comprehending Fitness Centers and Competitions

